Sending Web3 email from an ENS name using the Mailchain SDK #
Web3 users express themselves in many different ways. People often have multiple aliases and identities which they use in different contexts.
Name services provide a convenient way to remember and write blockchain addresses. They also underpin a large part of expression. Mailchain supports numerous name services used by the Ethereum community, including ENS, Unstoppable Domains and Freename.
In the next part of the workshop, we will be working with an ENS name in Mailchain. This also works for ENS subdomains and will support the upcoming name wrapper features.
NOTE: If you wish to use a name provided by another name service provider, you can find instructions for registering name services in Mailchain in the Web3 Domain Name Guides docs. The steps for sending to or from a name will be the same.
Prerequisites #
- A Mailchain account for test and dev (LINK to setup tasks)
- If you have completed Part 1 - Getting started with the Mailchain SDK, you can carry on using the same application folder and same account in Mailchain. If you did not complete part 1, you can fork the
mailchain-workshop-starter-noderepository for a convenient starting point. This comes with the@mailchain/sdkpreconfigured. Simply follow the ‘Getting Started’ section in the'README'repository. - An ENS name that resolves and reverse resolves to the
01-workshopwallet address that is registered with your Mailchain account used in this workshop. We recommend configuring a subdomain to work in test and dev.
Configuring your app to send from your ENS name #
Your ENS name should resolve to your 01-workshop address.
Update your code in
'server.js'to set the sender as your ENS address. Also, let’s update the subject of our message toMy first ENS messageYour
'server.js'should look similar to:require('dotenv').config() // imports .env environment variables const Mailchain = require('@mailchain/sdk').Mailchain; // imports the Mailchain SDK const secretRecoveryPhrase = process.env.SECRET_RECOVERY_PHRASE; // 24 word mnemonicPhrase const mailchain = Mailchain.fromSecretRecoveryPhrase(secretRecoveryPhrase); async function main() { const user = await mailchain.user() console.log(user) // confirm authentication const result = await mailchain.sendMail({ from: "your-ens-name@ens.mailchain.com", to: [ "0x521E47e180Ba4eeEB5A83f8c1728746bA4542B2F@ethereum.mailchain.com" ], // this should be your 02-workshop address subject: 'My first ENS message', content: { text: 'Hello Mailchain 👋', html: '<p>Hello Mailchain 👋</p>', } }); console.log(result); } main()Save the file and run the following in your terminal:
npm startYour terminal output should look similar to this:
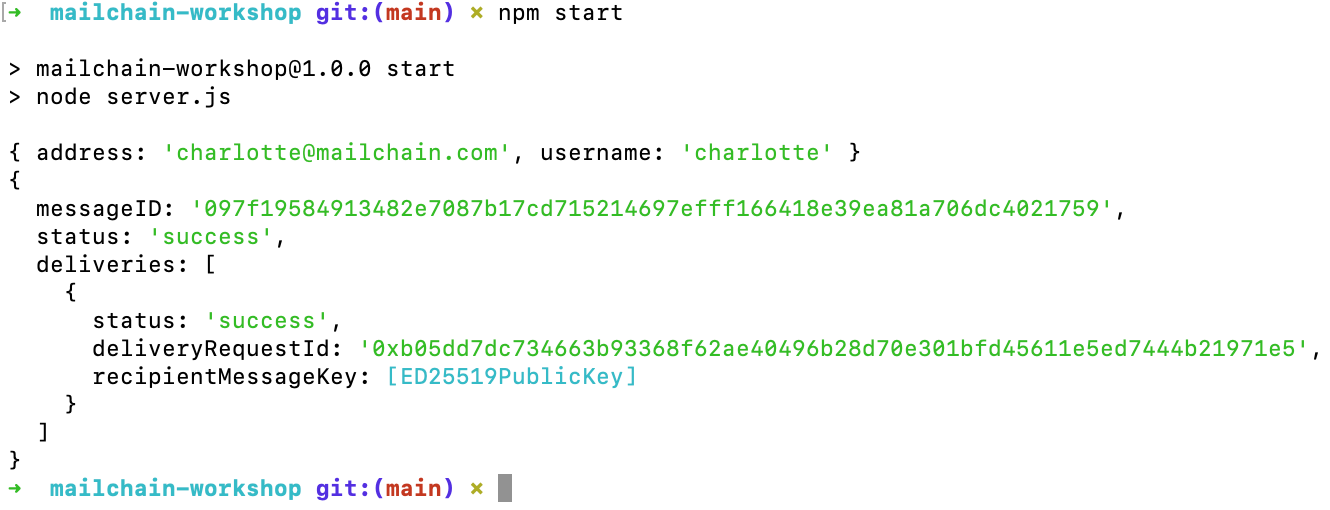
In your browser, go to https://app.mailchain.com. Click the refresh messages button
 and see your message in the Inbox.
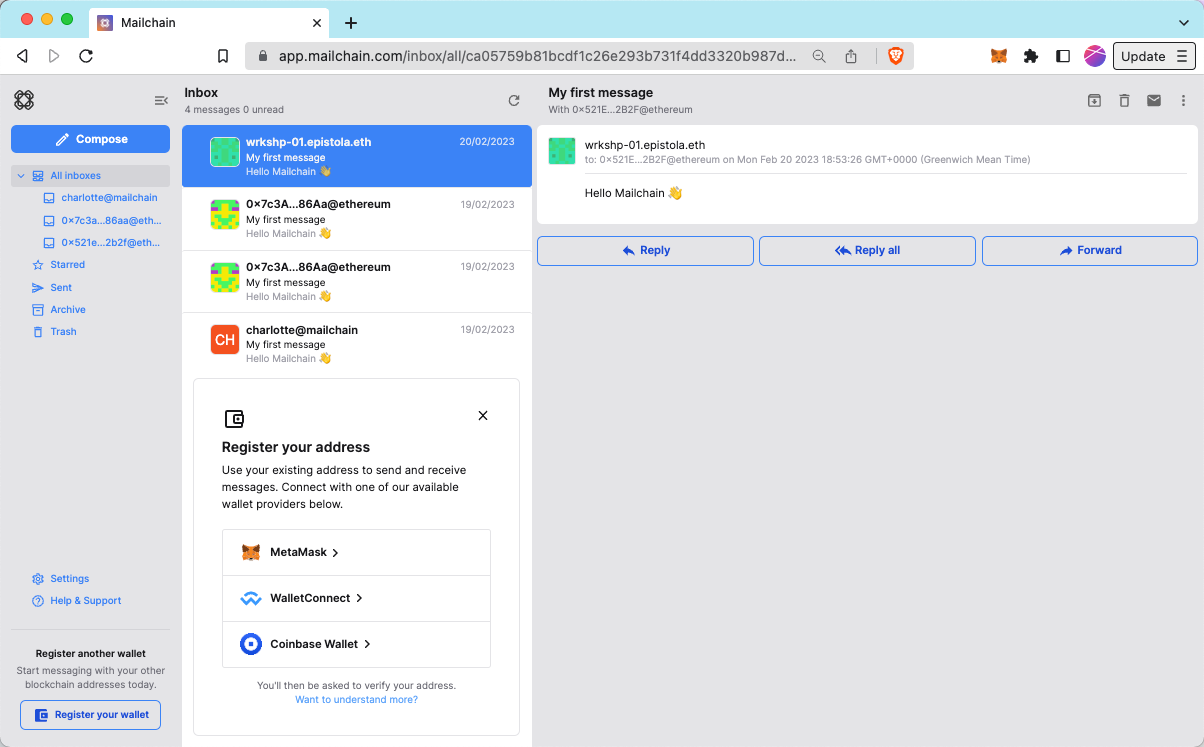
Success! You can now send messages from your ENS name. This is especially important if you are a web3 native DAO wanting to send official or verified communication from your ENS name.